If you’ve ever picked up one of your chickens and found a black scab on the bottom of their foot, chances are you’ve encountered bumblefoot.
As a backyard chicken keeper, I’d heard about bumblefoot for years, but I had never dealt with it myself. Then one day, one of my hens started limping. What I thought would be a simple inspection turned into a valuable lesson about flock health, early detection, and the importance of checking every bird regularly.
In this guide, I’ll walk you through exactly how I discovered bumblefoot in my flock, how I treated it, and what I learned along the way.
**Disclaimer** I am not a veterinarian, and the information shared in this article is not intended to replace professional veterinary advice, diagnosis, or treatment. This guide is based on my personal experience as a backyard chicken keeper and is provided for educational purposes only. Whenever possible, consult a qualified veterinarian regarding the health and care of your animals. Every situation is unique, and what worked for my flock may not be appropriate for yours.
Finding My First Bumblefoot Case
After nearly 6 years of raising chickens, I discovered my first case of bumblefoot.
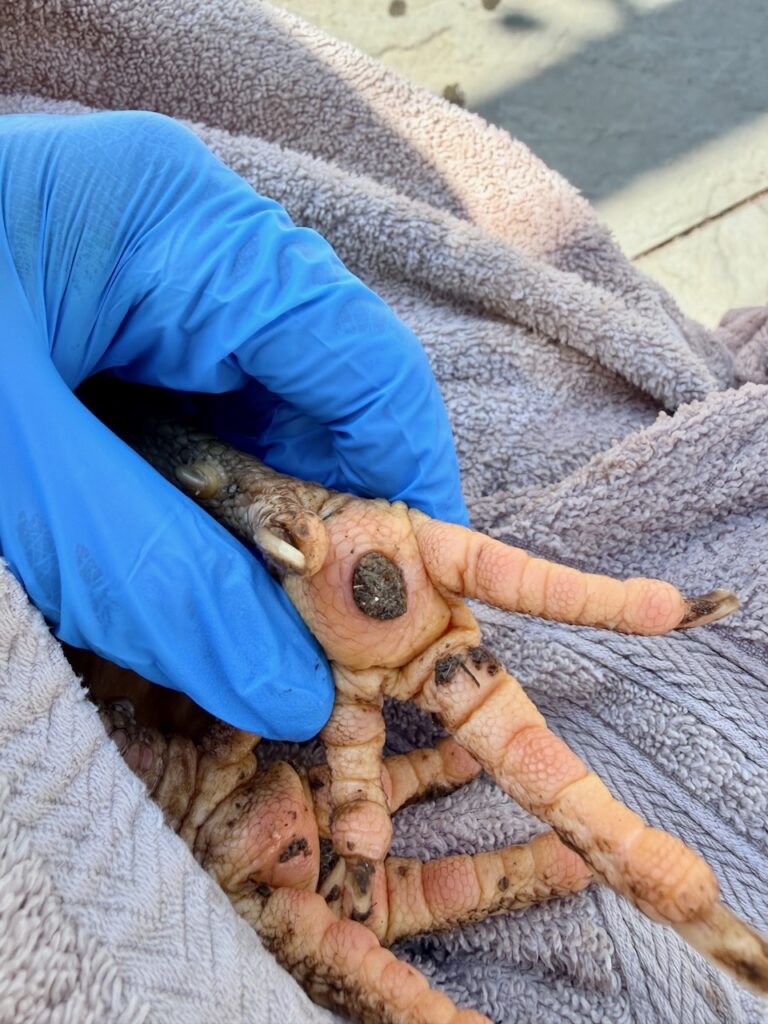
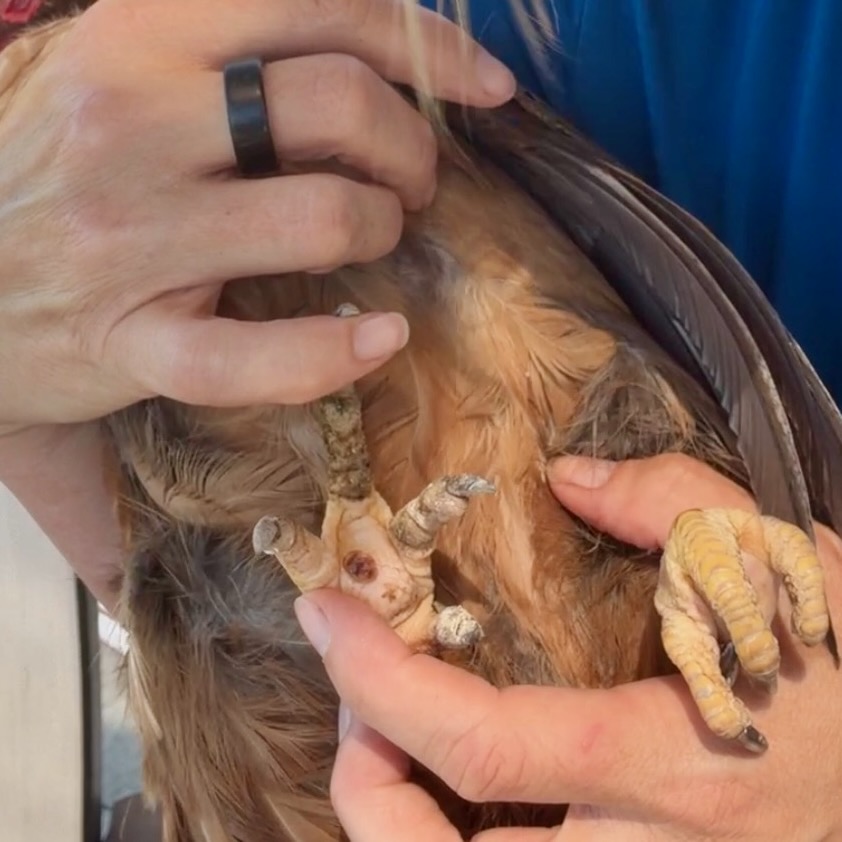
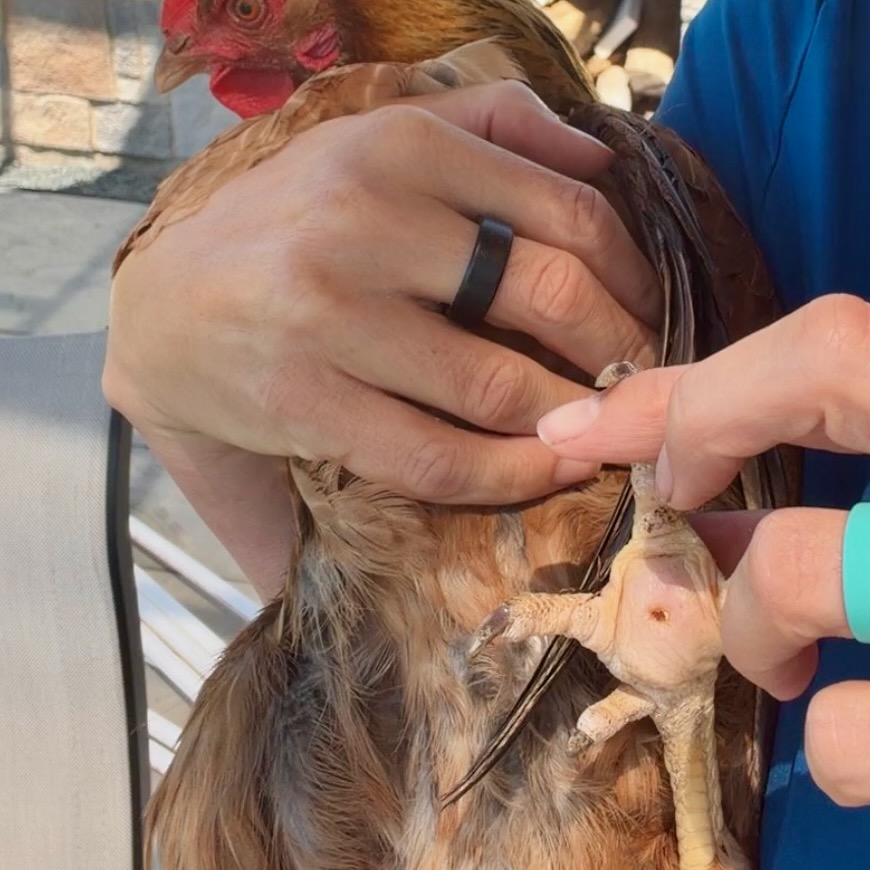
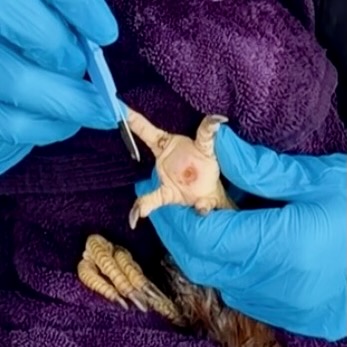
One of my hens started limping, so I picked her up for a closer look. Her foot looked swollen, and when I turned it over, I immediately noticed a black scab on the bottom of her foot. That black scab is often the tell-tale sign of a bumblefoot infection.
At first, I assumed I had one chicken with bumblefoot but after treating her, I decided to inspect the rest of my flock just to be safe.
I’m incredibly glad I did.
As I checked each bird, I found four more hens with bumblefoot. None of them were limping. None had swollen feet. None showed any obvious signs that something was wrong. The only clue was the small black scab on the bottom of their feet.
That experience completely changed how I think about flock health checks. Had I only treated the hen that was limping, the other four infections would have gone unnoticed.
After discovering multiple cases, I did a thorough inspection of my chicken coop and run looking for a possible cause. During my search, I found a broken screw sticking out of one of the roost bars. Whether it was the sole cause or not, it certainly had the potential to injure my chickens’ feet.
I removed it immediately and followed up with a deep cleaning of the coop. My hope is that by catching the infections early and eliminating potential hazards, my flock will stay healthy moving forward.
What Is Bumblefoot?
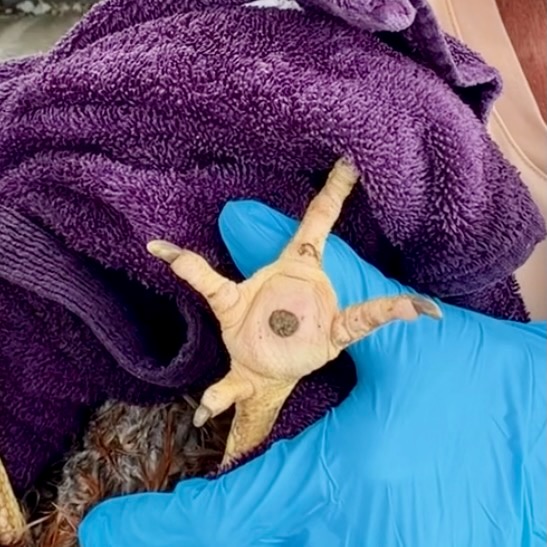
Bumblefoot, also known as plantar pododermatitis, is a bacterial infection that affects a chicken’s foot pad. The infection most commonly occurs when Staphylococcus aureus, a type of staphylococcus bacteria (staph infection), enters through small cuts, scrapes, or other injuries on a chicken’s foot. Once bacteria find an entry point, the chicken’s body attempts to fight the infection by walling it off, creating an abscess beneath the skin.
Over time, this often leads to swelling, the development of a scab, and the formation of an underlying infected core. While bumblefoot can affect many avian species, it is particularly common in backyard chickens and other backyard flocks.
What Causes Bumblefoot?
The most common cause of bumblefoot is a foot injury that allows bacteria to enter the tissue.
Some common causes include:
- Sharp objects in the coop or run
- Broken hardware or exposed screws
- Rough surfaces
- Hard surfaces
- Dirty bedding
- Wet conditions
- Poor sanitation
- Jumping from high roosts
- Obesity or extra weight in heavier breeds
Even tiny cuts can create the perfect entry point for a bacterial infection. That’s why routine inspections of your coop, run, and chickens’ feet are so important.
Signs and Symptoms of Bumblefoot
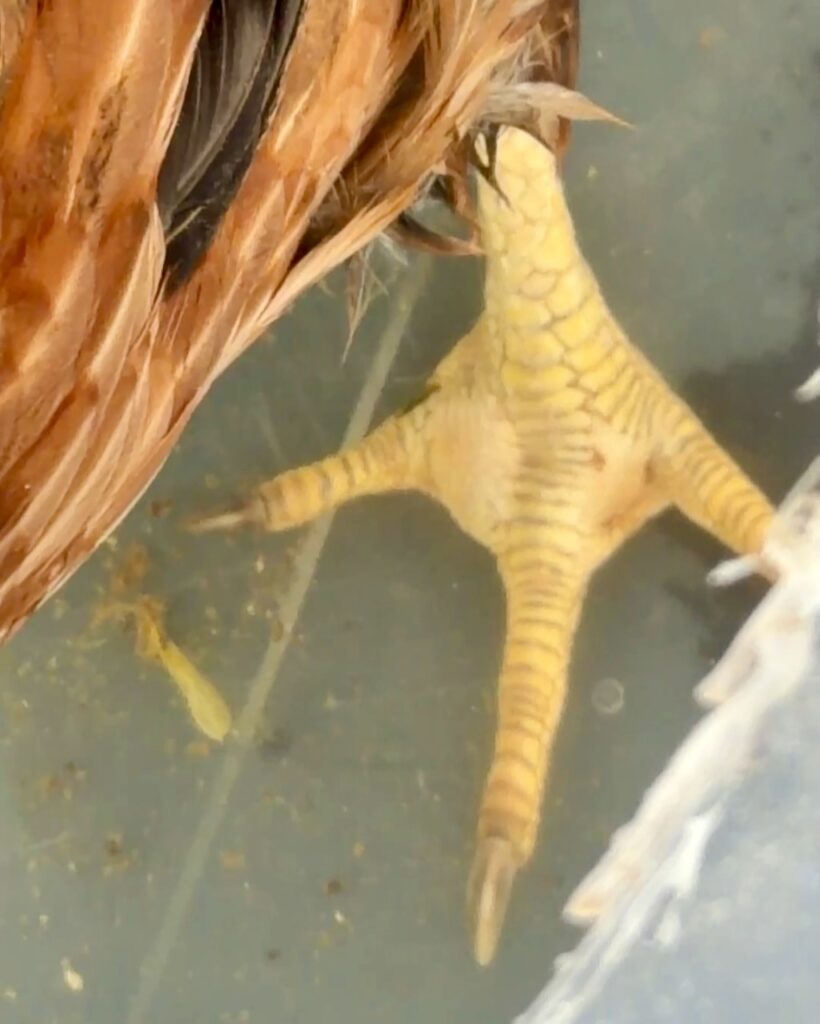
One of the challenges with bumblefoot is that chickens often hide discomfort very well. Some birds show obvious symptoms, while others appear completely normal despite having an infection.
Early Signs of Bumblefoot
In the early stages, you may notice:
- Mild limping
- Slight swelling
- Tenderness when handled
- Reluctance to perch or walk
The Classic Sign
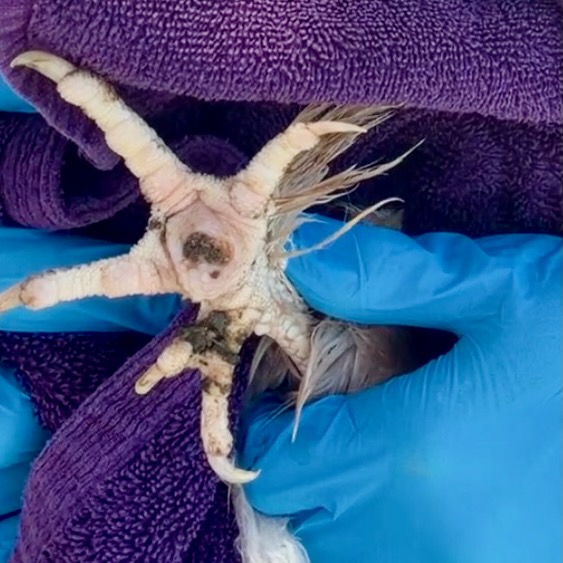
The most recognizable sign of bumblefoot is a black or brown scab on the bottom of the foot. This is often the first thing chicken owners notice.
Advanced Cases of Bumblefoot
As the infection progresses, symptoms can include:
- Increased swelling
- A pus-filled abscess
- Dead tissue
- Diseased tissue
- Significant pain
- Infection extending to the top of the foot
Severe cases of bumblefoot may require veterinary attention from an avian veterinarian.
A Lesson I Learned: Check Every Chicken
If there’s one thing I hope you take away from my experience, it’s this: If one chicken has bumblefoot, check every chicken.
When I found my first case, I almost stopped there because only one hen was showing symptoms. Thankfully, I decided to inspect the rest of the flock.
That decision led me to discover four additional hens with bumblefoot before their infections became severe. Many chickens won’t limp until the infection is more advanced. Sometimes the only sign is a small black scab hidden on the bottom of the foot. A quick flock check can help you catch infections early and make treatment much easier.
How I Treated Bumblefoot
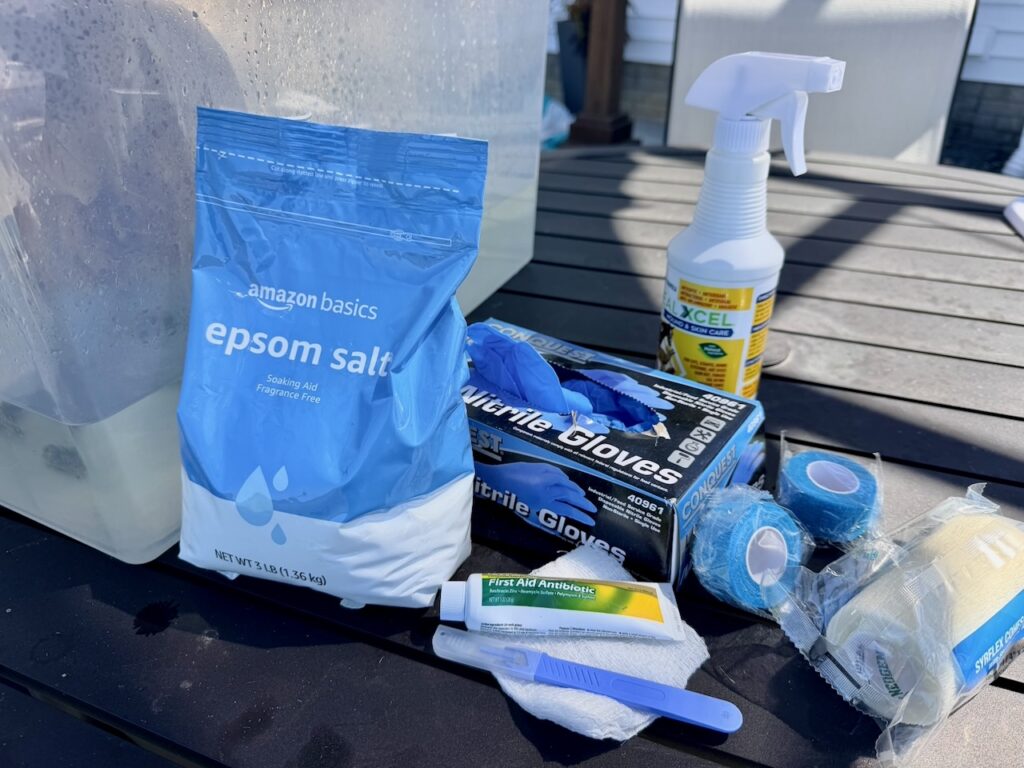
Once I identified the infected birds, I gathered my supplies and began treatment. If you want to see a video of me removing and treating bumblefoot on one of my hens, click here.
Supplies Needed
- Tote or bucket for soaking
- Warm water
- Unscented Epsom salts
- Saline solution
- Scalpel or tweezers
- Latex gloves
- Triple antibiotic ointment (without pain relievers)
- Gauze pads
- Vet wrap
- Paper towels
- Towel to wrap your chicken
Step 1: Soak the Foot
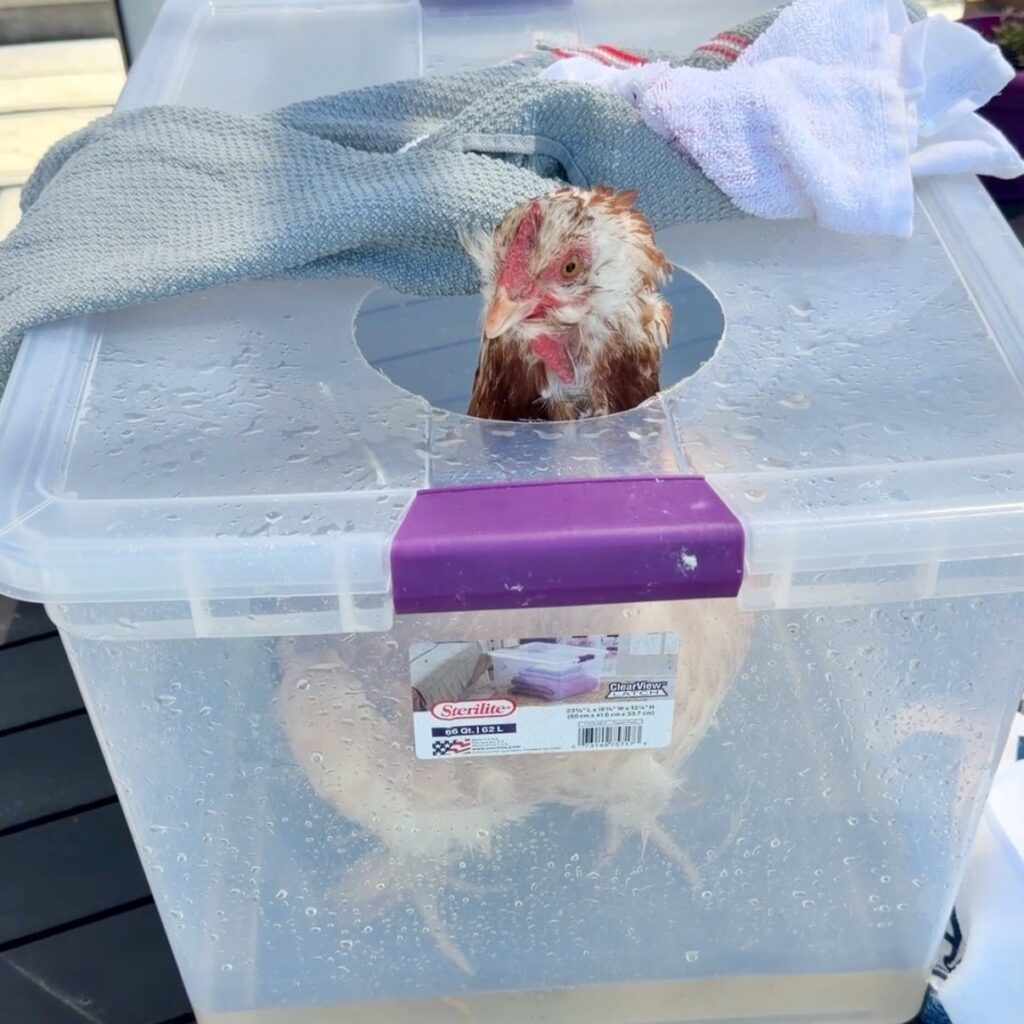
I start by soaking the affected foot in warm water mixed with Epsom salts for about 10 to 15 minutes. The warm water helps soften the scab and surrounding tissue, making it easier to work on the wound.
I use a clear tote with a hole cut into the lid so my chickens can comfortably stick their heads out while soaking.
Step 2: Remove the Scab
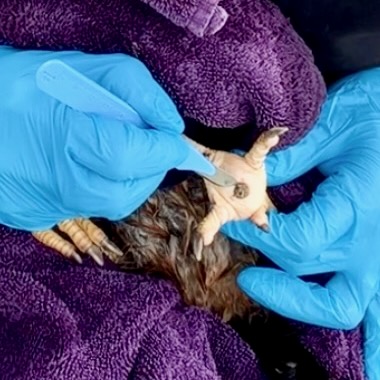
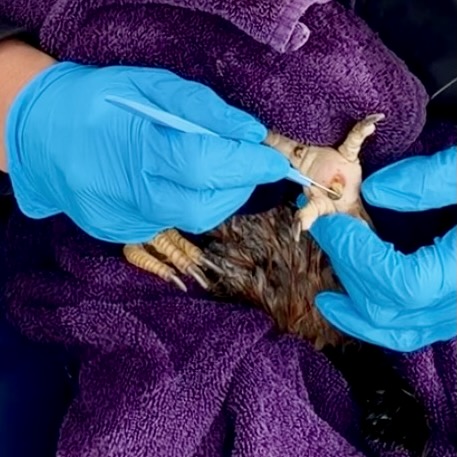
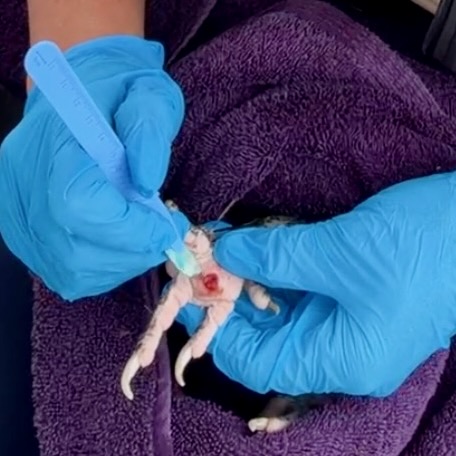
Once the scab softens, I carefully remove it using a scalpel, but you can use tweezers. Sometimes the entire scab lifts away easily. Other times it takes a bit more patience.
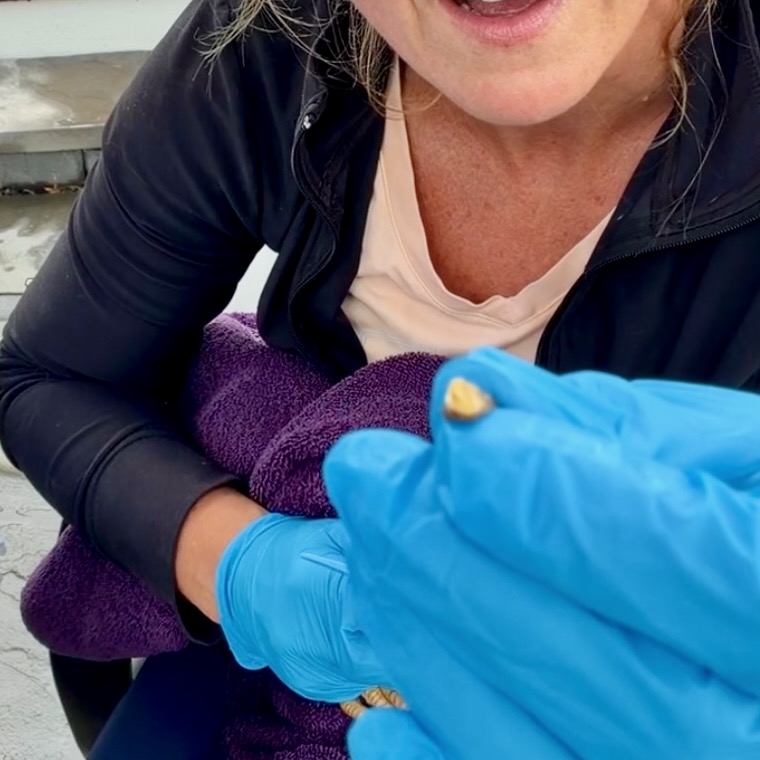
A helpful tip: When I take my chicken out of the tote, I immediately wrap them in a towel to hold their wings down. This makes it so much easier on both of us. I will even loosely cover their face with the towel and then they are still and let me do what I need to do.
Step 3: Remove the Infection Core
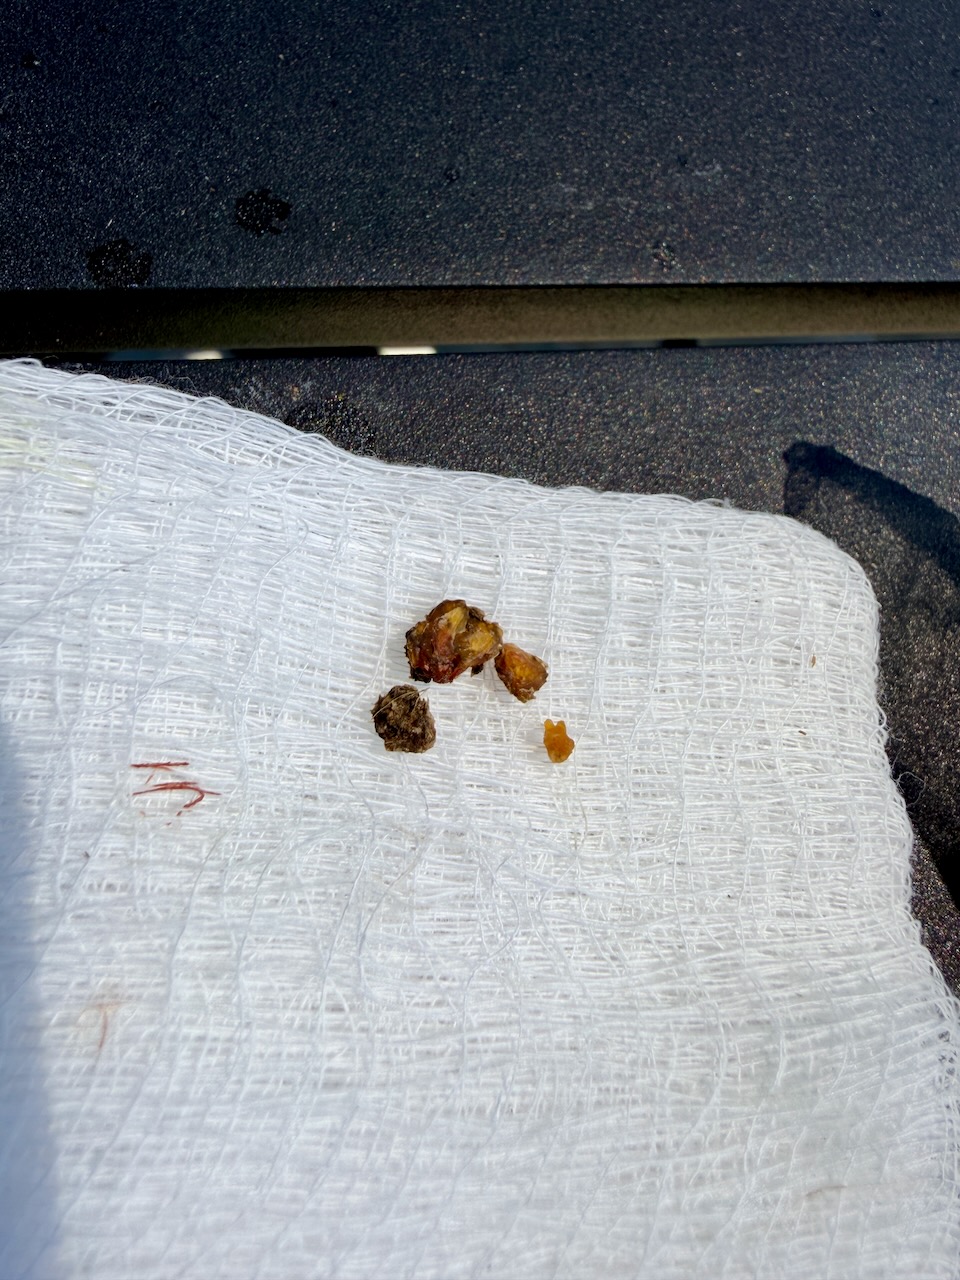
Underneath the scab you’ll often find a firm yellow or tan plug of infected material. Many chicken keepers refer to this as the infection core or kernel.
In some cases, the underlying infected core comes out attached to the scab. I had this happen a few times, and it makes everything so much easier. It comes out clean, and then you just have to disinfect, add ointment and wrap.
If it doesn’t come out that clean, you can use tweezers, to carefully remove as much infected material as possible. The goal is to remove the underlying infected core and any diseased tissue without causing unnecessary trauma to healthy tissue. This is when you’ll want the paper towels because you will have some blood.
Step 4: Flush the Wound
After removing the infected material, flush the open wound thoroughly with saline solution. This helps remove debris and reduce bacteria within the wound.
Step 5: Apply Triple Antibiotic Ointment
Next, apply triple antibiotic ointment to the wound. Be sure to use an ointment that does not contain pain relievers, as those ingredients may not be safe for chickens.
Step 6: Bandage the Foot
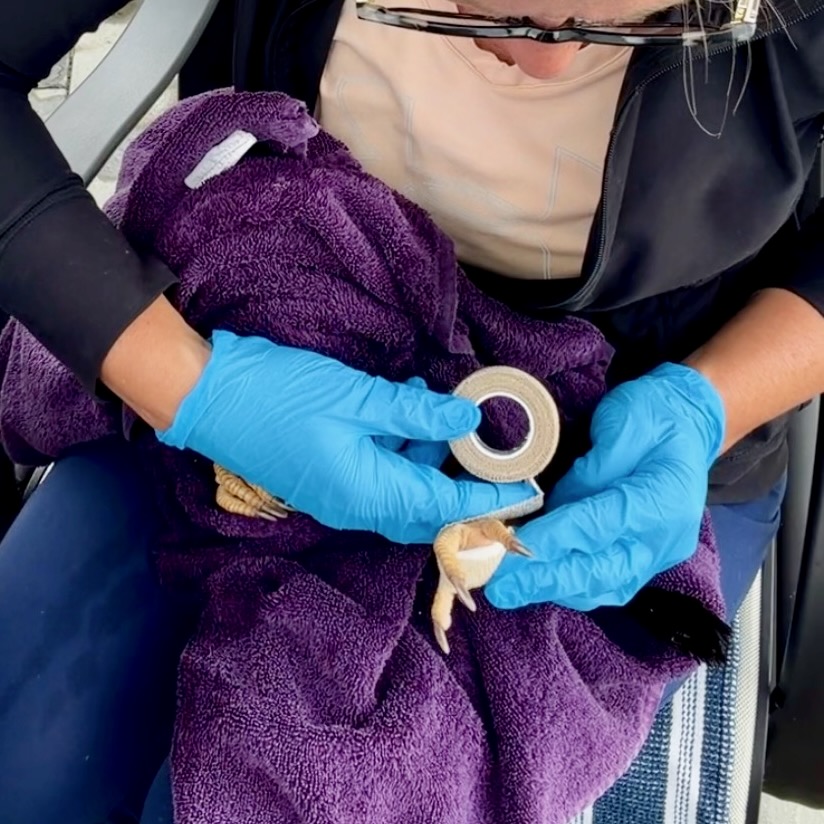
To keep the wound clean, place a gauze pad over the area and secure it with vet wrap. The bandage helps protect the wound while it heals and keeps dirt and bedding from entering the area.
Step 7: Change the Bandage Regularly
I change the bandage daily or every other day and monitor the healing process closely. Over time, healthy tissue begins filling in the wound and the foot gradually returns to normal.
When Should You See a Veterinarian?
Many mild cases of bumblefoot can be treated at home, but some infections require professional help.
Seek veterinary attention if:
- The infection continues spreading
- Swelling becomes severe
- The chicken stops eating
- The infection reaches the top of the foot
- The wound is not improving
- Your chicken appears lethargic or ill
An avian veterinarian can recommend additional treatment options and provide care for advanced cases of bumblefoot.
How to Prevent Bumblefoot
The best treatment is prevention. Here are some preventative measures that can help reduce the risk of bumblefoot in your flock.
Keep a Clean Environment
- Remove dirty bedding regularly
- Replace wet litter
- Provide clean water
- Maintain a dry coop
- Perform routine deep cleanings
Inspect Your Coop for Hazards
Regularly check for:
- Sharp objects
- Protruding screws
- Rough surfaces
- Broken boards
- Areas that could cause foot injuries
Check Your Chickens’ Feet
One of the simplest things you can do is regularly inspect your chickens’ feet. Catching bumblefoot early can prevent more serious infections from developing.
Support Healthy Birds
Good nutrition helps support strong immune systems and gives your chickens the resources they need to heal from minor injuries.
Final Thoughts
Finding my first bumblefoot case was definitely nerve-wracking, but it ended up teaching me an important lesson.
What started as one limping hen turned into five separate cases hidden throughout my flock. Without taking the time to inspect every bird, several of those infections likely would have continued progressing unnoticed.
The biggest takeaway I can share is this: don’t wait for your chickens to show symptoms. Take a few minutes every so often to pick up each bird and inspect them and their feet. It only takes a moment, but it can help you catch problems early, treat them quickly, and keep your flock healthy.
Have you ever dealt with bumblefoot in your flock? Let me know your experience in the comments below.
Related Posts:
Water Belly in Chickens
Treating Vent Gleet in Chickens
Keeping a Clean Coop
This post contains affiliate links, which means I make a small commission at no extra cost to you. See my full disclosure here.
Sign up for friendly chicken-keeping tips, seasonal care guides, and simple ways to create more calm in your days on the farm or in your backyard.